RV Before and After: The Details, Living Area and Kitchen

Hey guys! As most of you know last weekend we blew a tire on our RV, which caused quite a bit of damage and we are still working on the repairs, so you are seeing pictures here that were taken obviously before that happened! However, I wanted to continue sharing about all the renovation details. Today, I am continuing on giving all the details of the RV remodel for the living area and the kitchen. If you missed it two weeks ago, I shared every little detail about the bedroom and bathroom, which you can find here. If you don’t care about the details and just want to look at the pretty after pictures, you can head over to the Interior Reveal blog post here. For now, let’s dive into exactly what we did to transform the main living area.
Primer & Paint
Over a few blog posts, I am going through room by room, giving all the details and hopefully answering all of your questions. I am covering everything here: the raw materials we used, the tools we needed to complete the projects and then, of course, the links to all the pretty decor! So, I will start off by saying that we did the same paint color throughout the entire RV. All the white you see is BM Simply White and the darker green color is BM Deep River. We did all the wall and cabinets the same color, so we went ahead and purchased a spray gun from Harbor Freight for the project, which made things go a little faster. There are a lot of tips and tricks to make painting cabinets easier, but we wanted to make sure we did it right, so we took the advice from the very friendly gal at Sherwin Williams. We took the time to sand each and every cabinet, clean them well and then prime and paint. It was a process. At first, we got a quote to get the painting professionally done and the quote came back at $3k, which we thought was outrageous, but then seeing first hand how much work it actually was it didn’t seem so outrageous anymore. For the walls, we painted right over the wall paper making sure to clean it really well beforehand. You will notice a green strip of wallpaper in some of the before pictures and we did remove that strip just so all of the walls would be nice and smooth. The walls and the cabinets each took one coat of white primer and then two coats of paint. We kept all the original hinges and just spray painted them black. We did replace the cabinet pulls and they are from Amazon. They not only fit the decor perfectly, but they were also such a great price at $27 for 30 of them.
Flooring
We did 1867 Vinyl Planks throughout the RV in the color Evolution Magma Nevado and I am so happy with them! They are a company right out of Montreal!
The Tip Out/Living Room


When starting this project, all the research I did talked about being cautious of the weight while remodelling RV’s, especially in the tip out area. I was blown away to see how heavy the original couch was when we removed it! After taking that bad boy out, I knew we had plenty of wiggle room with weight. Then, out came the carpet - which was also pretty heavy. By this point, I knew we were good to go forward with whatever we wanted on the tip out.
We continued with removing everything from the “living room”. The window treatments came out by just unscrewing them - same with the bench seats and table. The couch was actually a little hard to navigate through the door until we realized the back slid right off, haha! Then, we had no problem fitting it out the door. We knew right away that we would not be using that couch in the renovation, so we put it up for sale on Facebook Marketplace and it sold right away for $150. We also listed the light pendents and they sold right away. It seems like people have furniture or other products break in their RV and they just want to replace it with the same thing that was there before.
Once we pulled the carpet out we saw what we knew could be a possibility - water damage in the corner of the tip out. Luckily, it was not too bad and we were able to salvage the flooring. There are quite a few YouTube videos with suggestions on how to deal with water damage in tip outs and from my research, if you take it in to get professionally fixed you are looking at a cost from anywhere from $1,000 - $3000. With that knowledge, I knew we would tackle this on our own. Everyone on YouTube seemed to just wing it, so we would do the same. I am lucky that my parents own a fire and flood restoration company so us “winging” it was probably a little more experience based than others on YouTube.

The subfloor was not damaged all the way through, so we chipped away the rotten wood until we got to a layer of clean flooring. We then filled in the missing flooring with weld epoxy, which was a two part process. Just follow the directions on the box. We let that dry and set for 24 hours before we went over the tip with the FeatherFinish underpayment patch and skim coat. We made it as even as possible and then let that set to dry. (I keep saying we, by we I mean my dad did all this, haha!). Lastly, we covered not only the water damaged area, but the entire tip out with 1/4 inch plywood, or pretreated subfloor from Home Depot. We screwed in the subfloor first, but after realizing that it might cause a problem with the hardwood floors being installed later we took out the screws.


The only special thing we had to do with the flooring in this area was to add an L trim around the slide out. We got a piece from Home Depot and stained it to match the flooring. We then used a nail gun (but using staples) to secure it to the flooring.
Okay now the fun stuff, decor! We found this couch (11) at Walmart for $140! It is pretty much a fancy futon and it folds down to make a decent sized bed.
Over the couch, we used this throw blanket (10) from Target that matched the room perfectly.
For the window treatments, my mom made the curtains, same as in the bedroom. The only difference is we did not use the black out lining on these ones, which I now wish we would have. We still might redo them at a later time to add the lining. Again, using small curtain rods from Target. For the small size windows (same as the window in the kitchen and by the door) we used the cut to size ones from Home Depot. You can get them cheaper from Ikea, but the shipping time was ridiculous, so we went ahead with these ones.
Note: Ikea has awesome stuff for RV renovations, just give yourself time for shipping if you don’t have a store near by.
In the dinette area we didn’t change much. We left the table top as is, since it matched the kitchen counter which we also did not change. The only thing we did was spray paint the legs and hardware black. For the cushions, I took them to a few different upholstery shops and was getting quotes for $500 plus to get them recovered. So instead, I just started asking around to family and friends to see if they knew someone who sews as a hobby and came across a lady that did them for $50! She has now done a couple of my friends cushions too and they all look great! We purchased our own fabric from Hobby Lobby using a 40% off coupon (which you can find online, never buy anything full price from there!) So overall the cushions cost us $150 to recover.
Fun fact for lighting, you can use normal residential lights in RV’s you just have to be aware of a couple things. First, they need to have an on and off switch. For example, the light above the dinette (which was $10 from the hardware store, just spray painted the top black) has a pull chain on it that turns it off and on. The light next to the couch did not have an on and off switch, so I added one! It was so easy. I purchased this push button (set of 5) from Amazon for $15, drilled a hole in the light base big enough for the button to fit through then just wired it into each of the black electrical wires coming from the RV. That was it, an off and on switch! You can use this trick for any residential light. The only other thing that you have to remember is you can only use 12V light bulb, I got this pack from Amazon.


The large rug is from Target I cannot find the exact rug online, but here is a similar one which is the same material. It is not and indoor/outdoor rug, but has worked great for us and has been easy to clean (just a quick vacuum). Believe me, my girls put it to the test!


The only real change we made in the corner above was using the same marine grade plywood from the bathroom as a little counter top under the TV. The trim around the doors were pretty beat up, so we went ahead and replaced that with new trim. We just went with the cheapest/lightest stuff they had at Home Depot.

A little RV hack: put a command hook near the door at the bottom. This way you can quickly open the door, reach in and grab the trailer key or truck key without having to actually go in to the trailer. This might sound silly or lazy, but it really is so, so convenient! Of course, I couldn’t put any old command hook there, I found these cute ones. (Ignore the trim below, this picture was taken before we put the new trim in.)


For the door, we added a little trim to give it a wainscoting look, which I think turned out so good and really added a chic touch to the living space. We got short little trim pieces from the hardware store and had my dad cut them using a 45 degree angle. The long pieces going horizontally are 17 inches long and the shorter pieces going vertically are 13 inches long. They are spaced around 8 and half inches apart. (I say about because this was a pain and my mom and I agreed that for sanity sake it didn’t have to be perfect) We measured and put the sticks in place and then taped them down using painters tape. Then, one by one, we went about gluing each stick down with wood glue then taping it back up to dry. We let it sit for 24 hours and then put on two coats of paint using a paint gun. A paint gun was the key to get a clean look, otherwise I think you would need to paint the door and sticks separately.

It wasn’t done in this photo, but we did change out the yellowish buttons -including the thermostat - with white ones we found on Amazon. You can find the thermostat here.
Note: To avoid the need to rewire completely for the tip out button or awning button (if you have an electric awning), pull off the button and check the prongs to make sure you are purchasing a new button with the same prongs. Then, you just have to click the new button onto the existing wiring, making life a lot easier! It was hard to tell on Amazon, so we went to our local camping world where we could physically see the prongs to make sure we were getting the correct one.


We took out the chair above, which was just too big and bulky. Again, it was pretty heavy! Taking it out gave us some more weight to work with. Once again, we threw it up on Facebook Marketplace and it sold within a couple of days for $75.
Note: when painting the walls in this area, you can just paint over the existing wallpaper that covers all the walls, but these little strip wallpaper pieces need to come off. They pull off pretty easily and any areas we had trouble with, we just used a blow dryer over them for a second and then we were able to pull them right off.
The coat rack was another Amazon find. I had seen something similar at Target for $40 and thought that was a bit steep. I ended up finding this plain wood one from Amazon and just spray painted it black! Super easy and way less than half the price. Also found this little basket (9) off of Amazon, which has come in handy to throw our sunglasses or flashlights in.
Again, for the window treatment here we went with the cut to fit ones from the hardware store.
The entry rug you can find here.
The Kitchen

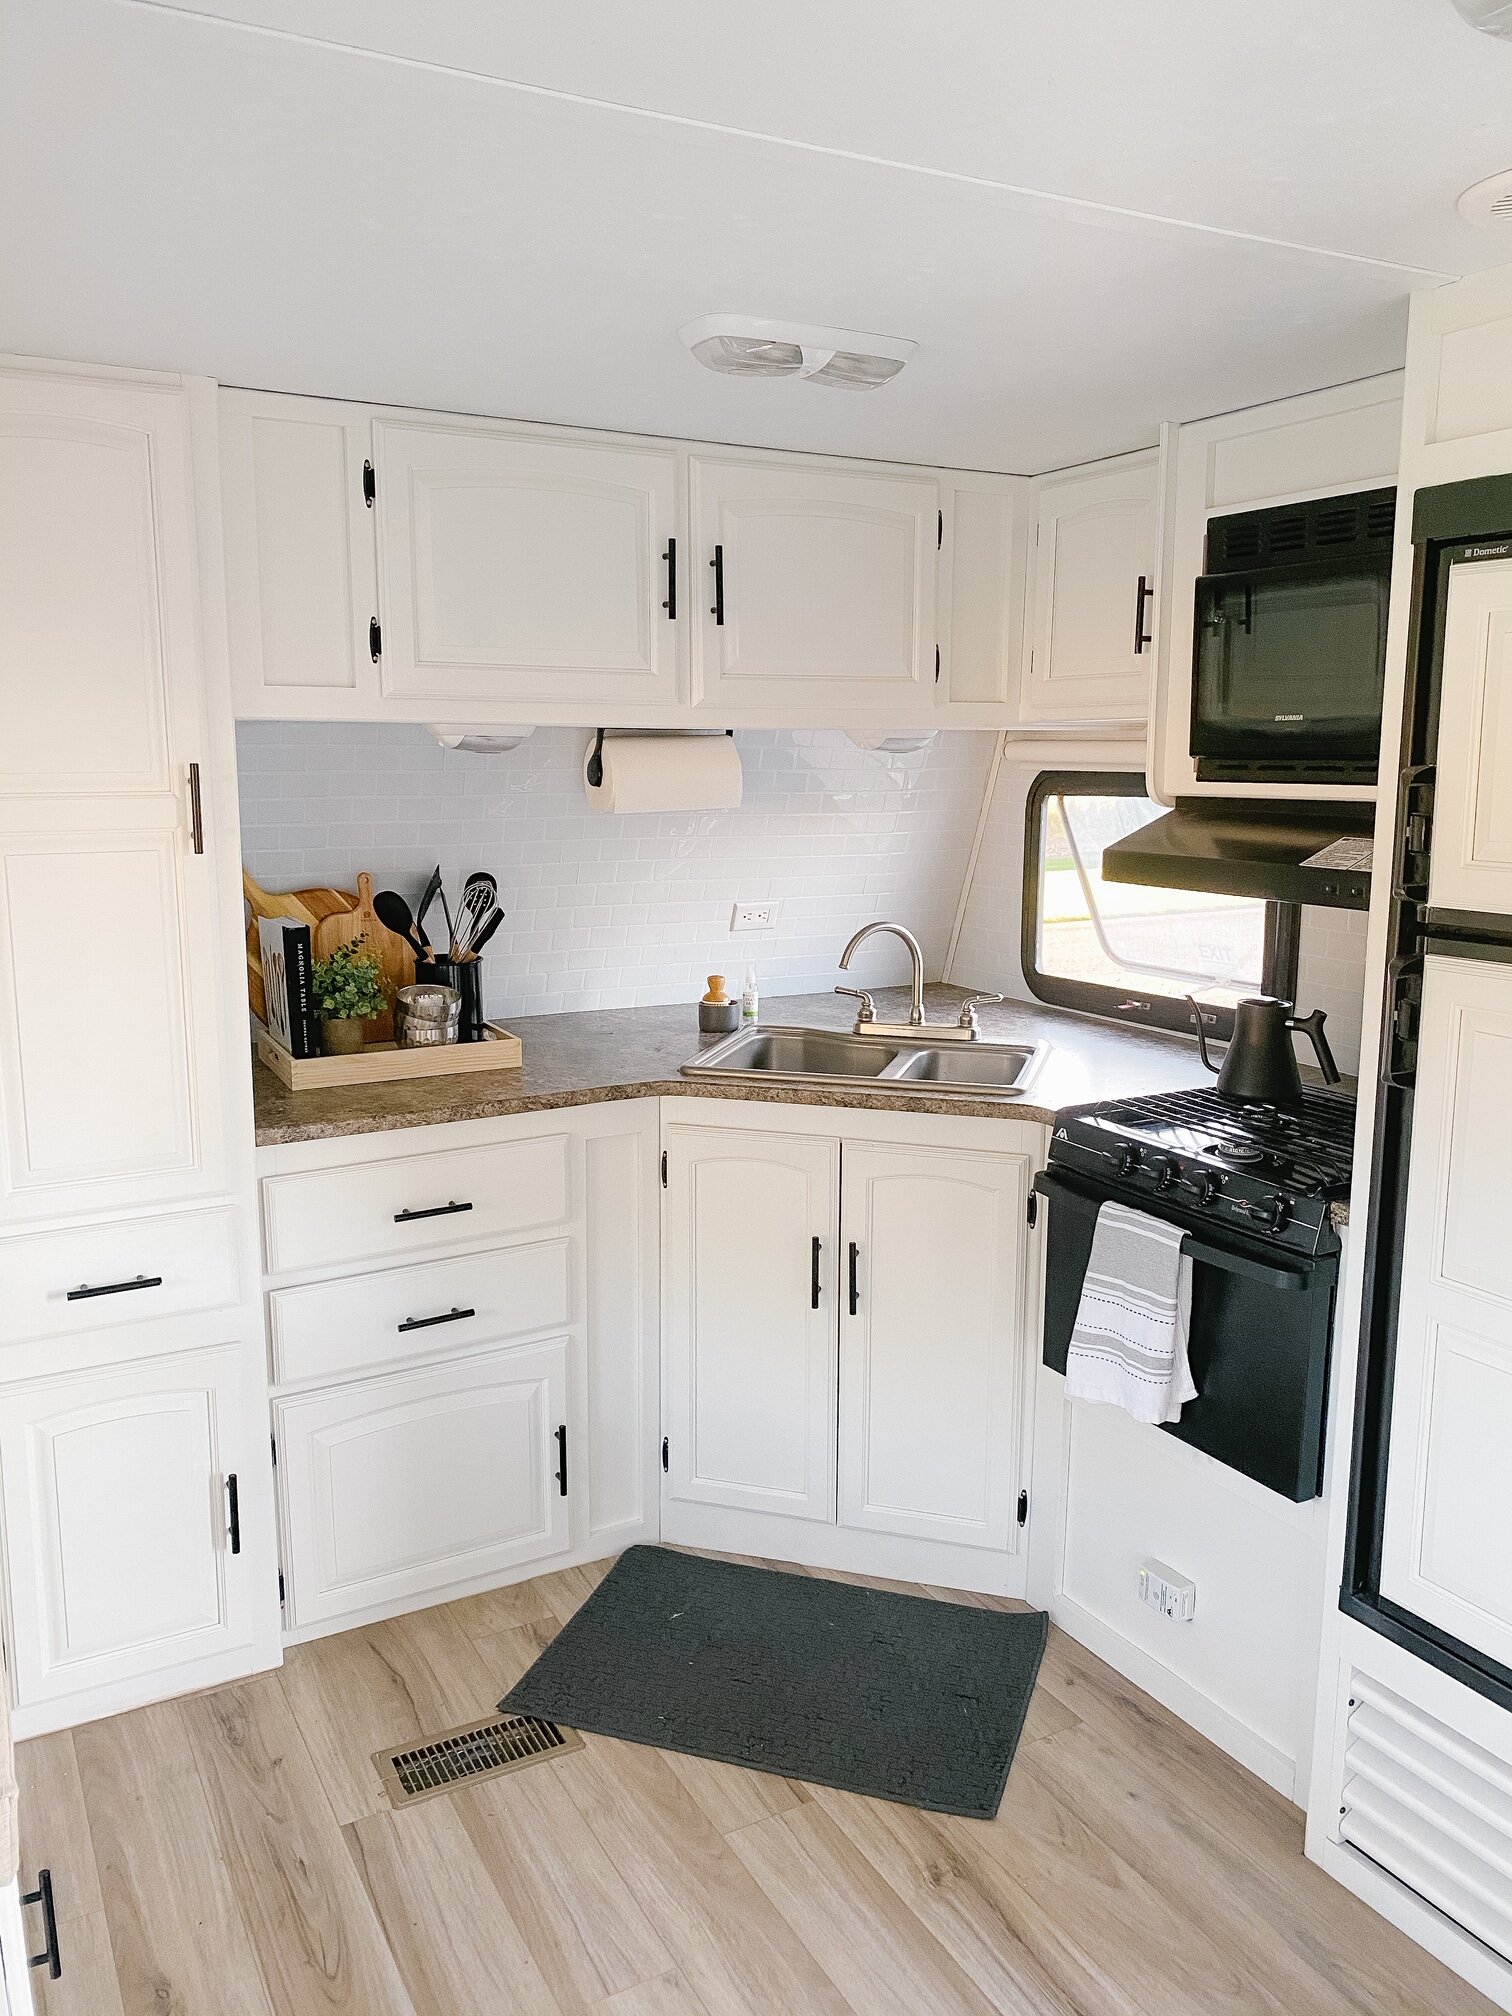
We didn’t do too much in this area, just painting the cabinets and changing out the hardware made the biggest difference! As you can see, we also painted the wood paneling that was on the fridge.

I didn’t hate the counter top and sink, so we decided to just leave them. I did add a backsplash, again using the Tik Tac tiles from Amazon.
Tip: People say you can just cut these with scissors, which you can, but I was definitely not getting a straight edge using scissors. I ended up using a razor blade and metal ruler to make my cuts, but looking back my mom has one of those old school paper cutters that would have made it even easier. ALSO, if you are going around a window do yourself a favor and take off the trim around the window. It is the only thing holding the window in so you can see on the other side we just used painters tape to support the window, but this made it so we wouldn’t have to have perfect cuts around the window, which probably saved at least an hour of time and effort.
Note: These are not heat resistant, so when using the back burners I place one of the cutting boards up against the wall to protect it from heat. That is one of the reasons you see a lot of cutting boards on top of the range in RV remodels!
So, now on to the decor!


What You Can’t See:

As much time as I take to make sure everything is pretty on the outside, I put just as much effort on making things pretty inside the cabinets. So, these are the items we have inside:
Coffee Mugs (2)
Cute napkins I always find at Target and it makes the portable utensil holder that much cuter!
I think that pretty much sums up the inside of our RV remodel. If you have any more questions, feel free to leave them in the comments below. With all the changes and new products, I’m sure I’ve left something out! Stay tuned to the blog - there will be an exterior reveal and blog post very soon! I am very excited to share that with all of you.
Much Love,
